Chapter 4: Dress Pattern Development and Digital Toile Check
"Flat Pattern Making and Digital Toile Check" by Masaharu Sekikawa
- Study


Link copied.
In the last and the previous sessions, we covered shirts, blouses, and other tops.
This time, we will explain dress pattern making with a retro feel and its digital toile check. Let's get started.
1. Development from the Sheath Dress Sloper
A sheath dress sloper is a dress prototype with a long, narrow silhouette that fits closely to the body, like a sheath for a sword.
Let's start by modifying a princess sloper created through draping to include auxiliary darts.
Figure 1: Prepare a princess sloper created through draping.
On the princess line side of the front and back side panels, mark the waist position at 20mm and create auxiliary darts with the same width (20mm) in the center (the red lines).
The side seams of the side panels are left unchanged from the original sloper.
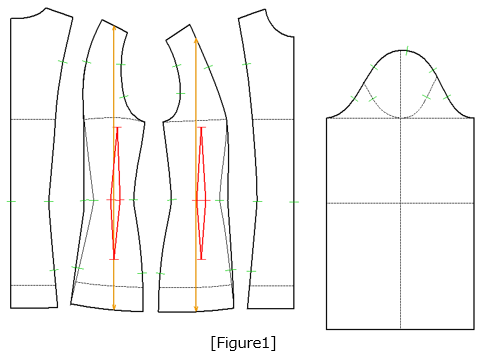
Figure 2: Perform a digital toile check of the princess sloper with auxiliary darts.
You can confirm that ease has been added around the bust and hips.
Also, check the position of the auxiliary darts.
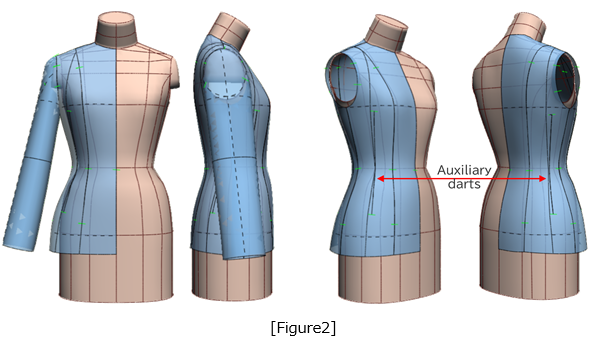
Figure 3: Integrate the front and back side pieces at the red circled positions.
Rotate parts A and B around the first and third notches, respectively, until the corners meet the horizontal guidelines (the blue lines).
Clean up the pattern and convert the waist darts on the front and back bodies into two darts each.
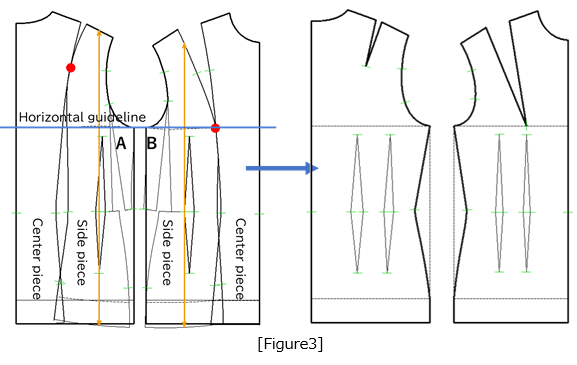
Figure 4: Reduce the ease added to the bust by 15mm horizontally, keeping the armhole seam width consistent on both the front and back.
Then, redraw the shoulder and armhole lines.
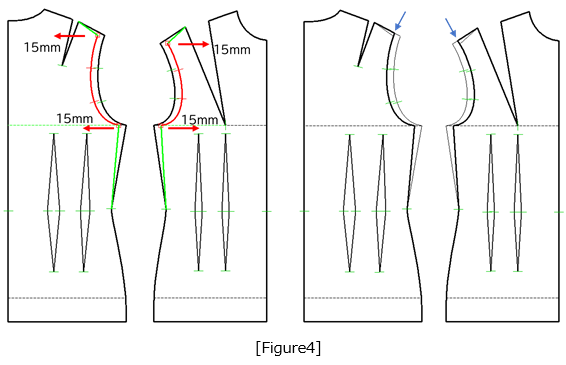
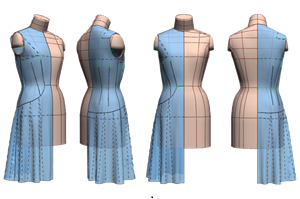
Figure 5: Extend the completed torso sloper to knee length, perform a digital toile check using ACS_LadiesHumanBody, and finalize the sheath dress sloper.
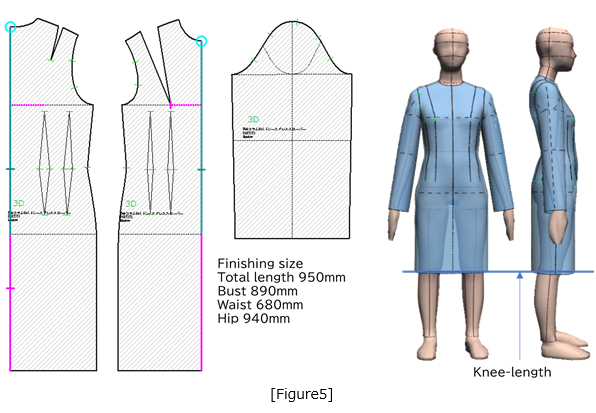
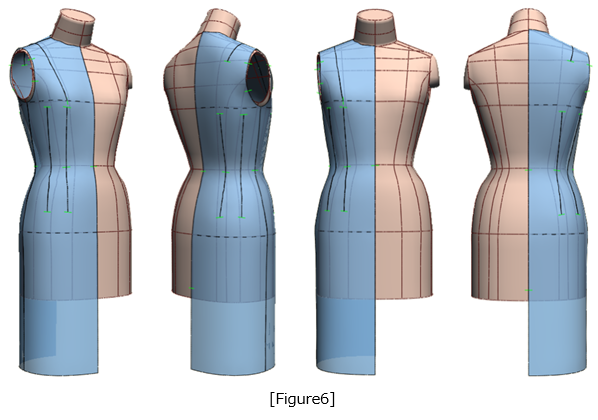
Figure 6: Perform a digital toile check of the sheath dress sloper using the ACS_Ladies (Set-In) body.
2. Development into a Dress Pattern
(1) First Key Point of Pattern Modification
Manipulation of the Front Body Bust Darts
Figure 7: Draw the shoulder dart extension line from the bust point to the side seam, and extend the waist dart point so that it touches this line.
Move the width of the center dart and auxiliary dart to the waist positions ⓐ and ⓑ.
Connect ⓐ with the side seam ⓒ to create the skirt transition line, and adjust the pattern so that the moved dart lines touch this transition line.
Figure 8: Draw the extension line to the second notch, and with the bust point as the rotation center, close the shoulder dart and open it by 8mm.
At the two rotation centers on the shoulder dart extension line (the two red dots), distribute the remaining shoulder dart width between the waist positions ⓐ and ⓑ, and close the side seam.
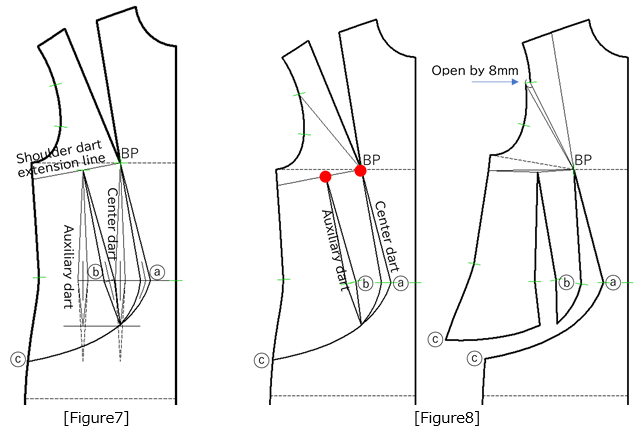
Figure 9: Align the front and back bodies at the waistline on the side seam, and then draw a smooth transition line for the front and back skirt sections.
Figure 10: With the back shoulder dart point as the rotation center, open 4mm at the fourth notch and use the remaining shoulder seam ease.
Redraw the armhole and clean up the front and back bodies patterns.
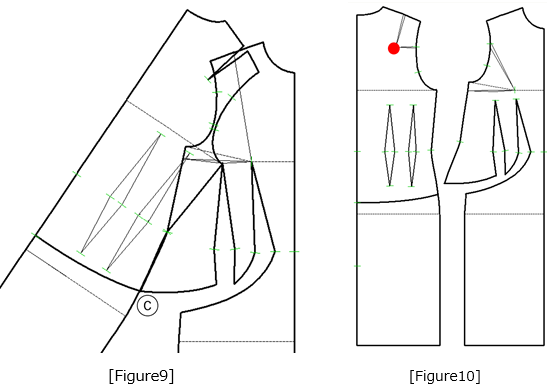
Figure 11: Separate the skirt portion from the bodies and draw extension lines for the front and back skirts.
Figure 12: Use the intersection points of the skirt transition lines as rotation centers, and open 60mm at the hemline and 30mm at the side seam hemline.
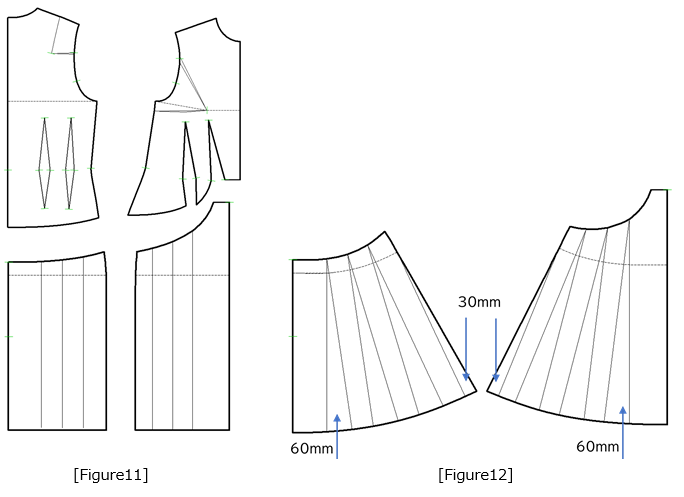
Figure 13: Perform a digital toile check of the dress using the ACS_Ladies (Set-In) body.
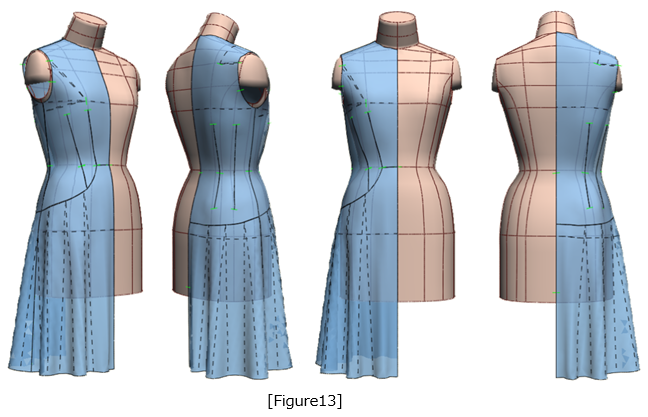
Figure 14: Adjust the sleeve sloper to match the armhole.
Draw vertical lines from the second and fourth notches to the sleeve hemline, and create a concave line between the two notches.
Use the intersection points with the sleeve hemline as rotation centers, and open the sleeve cap by 3mm towards the side.
Expand the concave line upwards by 3mm at a parallel orientation.
Figure 15: Draw vertical lines from the intersection points of the sleeve and extend them to the sleeve hemline.
Separate the cuff by 30mm from the sleeve.
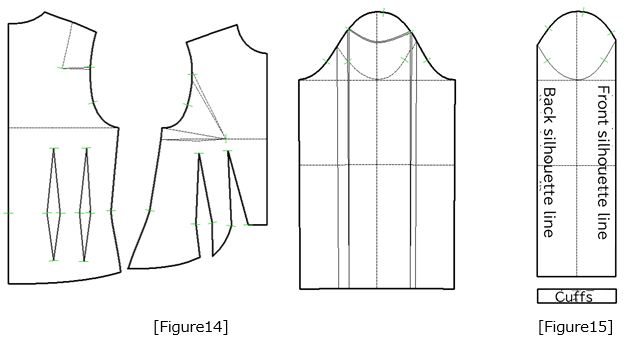
Figure 16: Adjust the back silhouette line by opening it 20mm outward from the intersection with the sleeve hemline and 10mm outward from the intersection with the front silhouette line.
Figure 17: Create the cuff with a length of 30mm and a width of 220mm.
Allow an 80mm opening on the back silhouette line.
Adjust the sleeve cap notch position and clean up the pattern.
Add 10mm of gathering allowance to the sleeve hem.
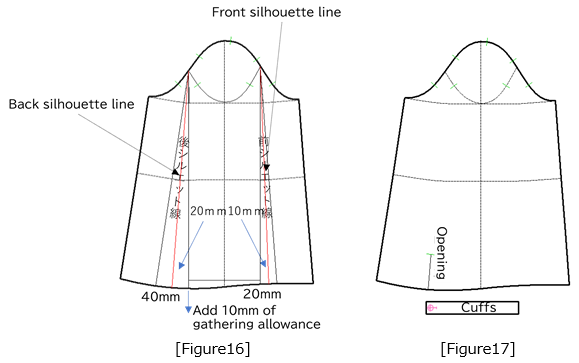
Figure 18: Perform a digital toile check.
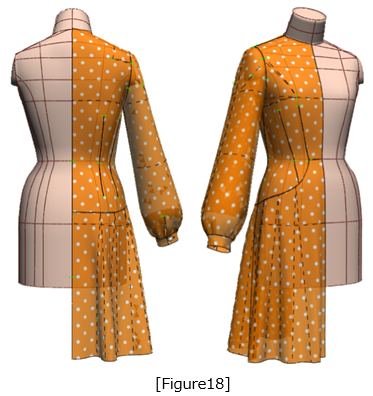
Figure 19: Align the shoulder seams of the front and back bodies.
Drop the side neck point by 5mm and the center neck point by 10mm.
Figure 20: Use the lowered side neck point (red circle) as the rotation center and rotate the back body so that the back shoulder dart position overlaps the front body by 8mm.
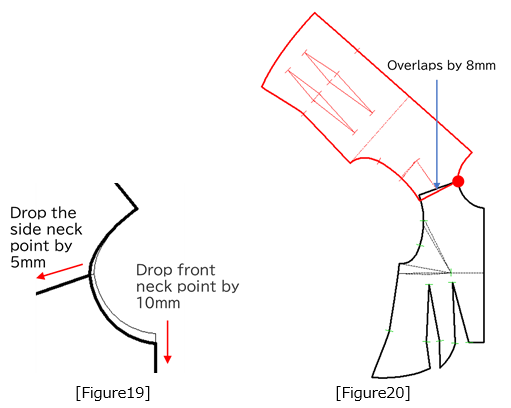
Figure 21: Mark the points 5mm directly below the back neck point and the front neck point as ⓓ and ⓔ, respectively.
Adjust the front and back collar attachment lines to match the body collar attachment dimensions.
Figure 22: Draw the collar's outer edge line with a width of 60mm.
Draw a small rounded end on the front collar edge.
Figure 23: Clean up the collar pattern and extract it.
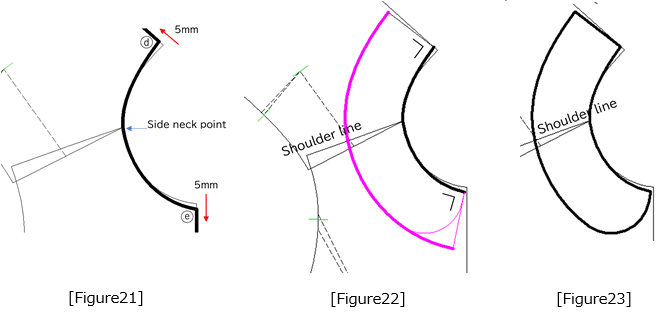
Figure 24: Perform a digital toile check of the collar.
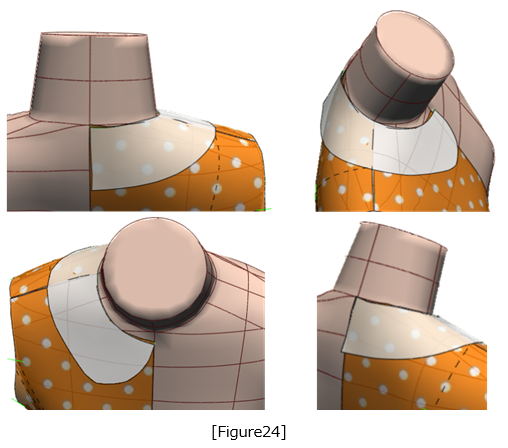
Figure 25: From the flat collar pattern, you can create a 1-inch (approximately 20–25mm) stand-and-roll collar.
Prepare the collar pattern created in Figure 23 and draw 6 extension lines.
Figure 26: Use the intersection of the collar attachment line and the extension lines as the rotation center.
old the collar's outer edge line (approximately 13.5mm each) and perform a digital toile check.
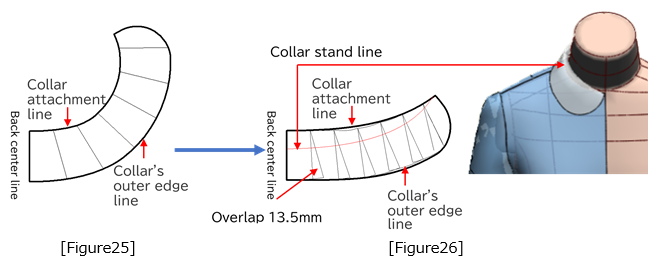
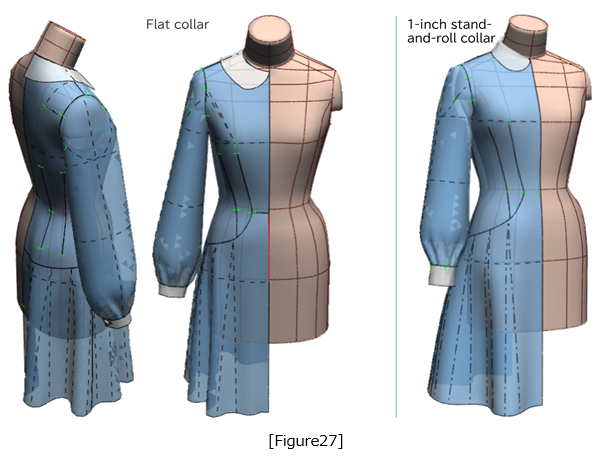
Figure 27: Assemble the digital toile of the flat collar dress and compare it with the 1-inch stand-and-roll collar.
|
Masaharu Sekikawa 2002 - 2017: Principal at the International Total Fashion College Currently retired as principal and serving as a part-time lecturer at the International Total Fashion College, specializing in apparel CAD education. In June 2017, he published a book on digital toile research and simultaneously launched a website. Please see below. |

| Academic Presentations |
Delivered a presentation on "Pattern & 3D Simulation Verification of Women's Tailored Jackets Using 3D Toile" at the National Conference of the Fashion Business Society in 2016. Delivered a presentation on “Practical Applications of Digital Toile” at the National Conference of the Fashion Business Society in 2017. |
| Website | http://masa-cad.com/ |
| Publications | https://masacad.thebase.in/ |