Chapter 16: Drop-Shoulder Jacket Pattern and Digital Toile Check
"Flat Pattern Making and Digital Toile Check" by Masaharu Sekikawa
- Study


Link copied.
In this chapter, we will cover the patternmaking and digital toile check process for the drop-shoulder jacket, an essential casualwear favorite. Let’s get started.
Chapter 16: Drop-Shoulder Jacket Pattern and Digital Toile Check
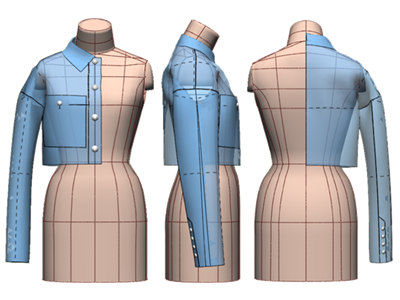
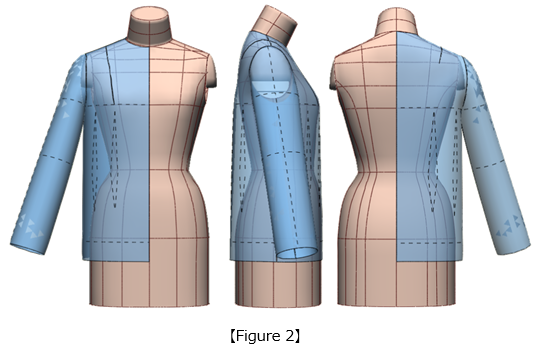
1. Perform a Toile Check on the Jacket Sloper
Figure 1: To create a straight silhouette, add 40 mm of width to the base sloper.
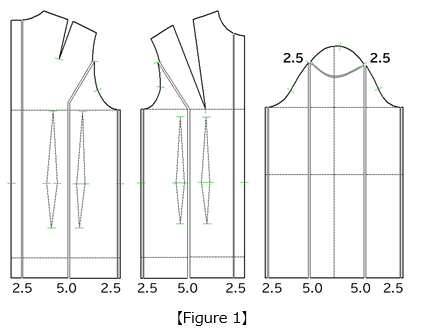
Figure 2: Place the toile on the ACS_Ladies (Set-In Sleeve) body form to check the silhouette.
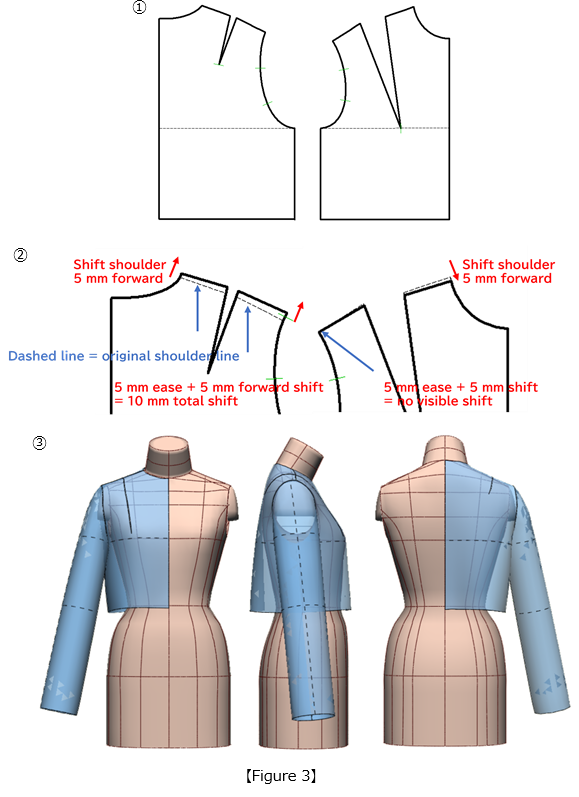
2. Shift the Shoulder Forward
Figure 3: ① Separate the front and back slopers at the waistline.
② Shift the shoulder line forward. This prevents the sleeve from falling backward.
③ Perform a toile check to confirm the silhouette.
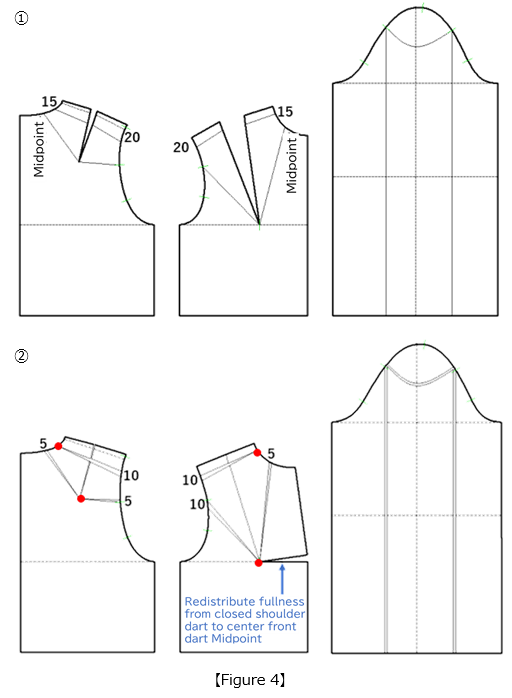
3. Modify the Bodice Using Dart Manipulation
Figure 4: ① Draw manipulation lines on the front and back bodice and the sleeve.
② Using the red circle as the pivot point, open 10 mm along the line near the shoulder to add shoulder volume. Open the neckline by 5 mm and make two openings of 5 mm and 10 mm along the armhole. Close the front shoulder dart and transfer the fullness to the center front dart. To create a drop-shoulder sleeve, reduce the sleeve cap ease to approximately 15 mm in total.
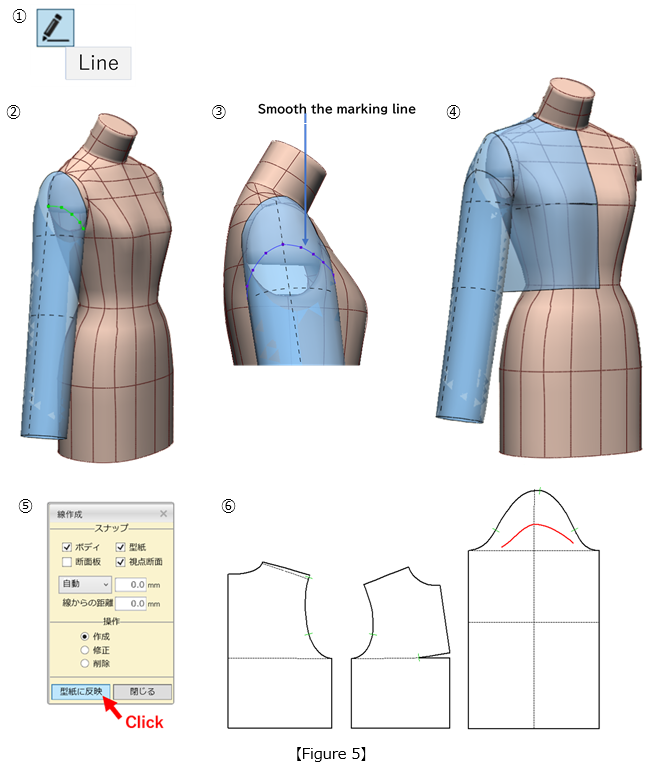
4. Define the Drop-Shoulder Position Using a 3D Toile
Figure 5: ① From the 3D menu, select [Create Line].
② Mark the drop-shoulder position on the sleeve cap (green line).
③ Smooth your marked line connections.
④ Your marking is now finished.
⑤ Click [Apply to Pattern].
⑥ The drop-shoulder position will be applied to the 2D pattern (red line).
5. Modify to Create a Drop-Shoulder Sleeve
Figure 6: ① Align the bodice at the shoulder line and the sleeve at the notch. Draw a parallel line 30 mm above the sleeve width line.
② Use the marked sleeve cap line as a guide and redraw the armhole on the bodice.
③ Redraw the sleeve cap to match the new armhole length. Complete the sleeve with a 250 mm hem width.

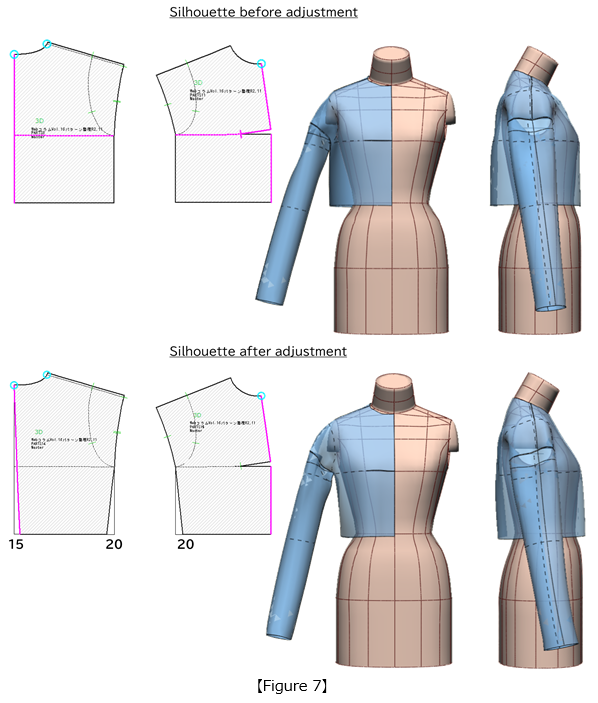
6. Perform a Toile Check and Adjust the Bodice Silhouette
Figure 7: Set the seam parameters and place the toile on the body form. If left in a straight silhouette, there will be excessive volume at the waist. Removing 15 mm at the center back waist and 20 mm at both side seams improves the garment's overall balance.
7. Create the Collar
Figure 8: ① Lower the neckline by 5 mm at the side neck point and 10 mm at the front neck point.
② Draw the outer collar edge line as shown.
③ Connect the collar line sketched freehand between the point 40 mm to the right and the point 20 mm to the left, and place notches at the positions marked with ● where the collar attachment lengths are equal.
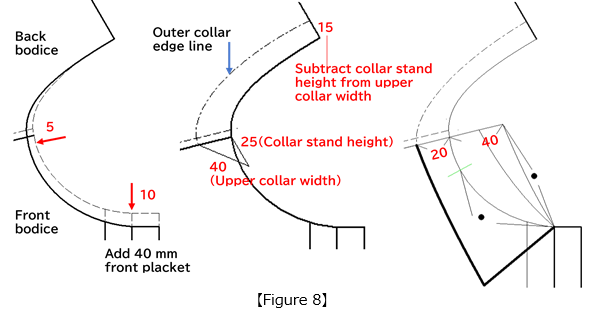
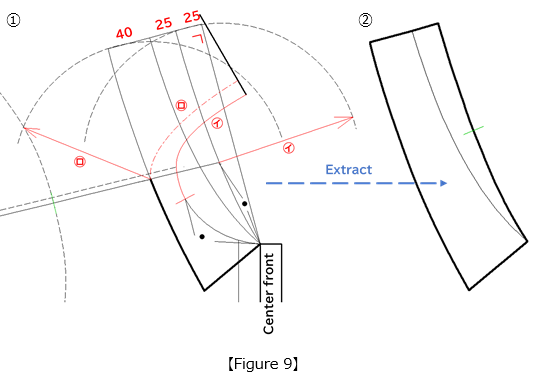
Figure 9: ① Draw an arc using the collar attachment line (red solid line ㋑) as the radius. Next, draw another arc using the outer collar edge line (red dot-dash line ㋺) as the radius. Draw a tangent line between the arcs. Use this line as the center back collar line and draft the collar.
② Extract the collar.
8. Align the Collar with the Bodice Neckline
Figure 10: ① Use the red circles on the collar stand line as the pivot points. Open the outer collar edge line 3 mm at each.
② Align the collar with the front bodice center line and smooth the neckline curve.
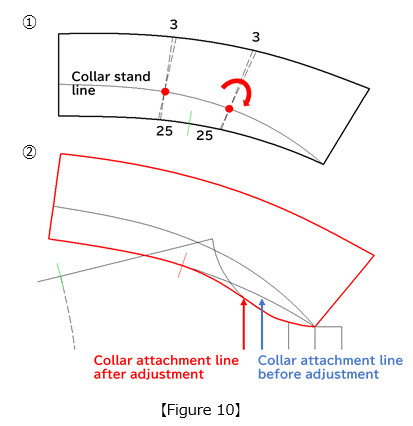
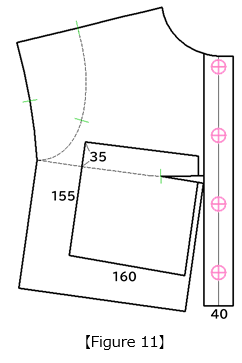
Figure 11: Add a 40 mm wide front placket and pocket. Position four 15 mm buttons 15 mm from the starting point and 45 mm from the end point.
9. Create a Two-Piece Sleeve
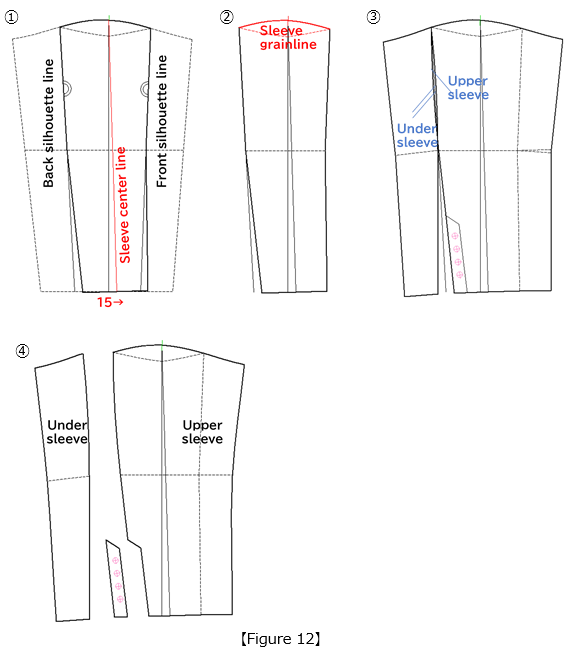
Figure 12: ① Fold the sleeve sloper along the front and back silhouette lines. Move the sleeve center line 15 mm forward from the cuff intersection point (red line).
② Adjust the sleeve grainline and clean up the pattern.
③ Open the sleeve along the shifted silhouette lines and divide it into a two-piece sleeve with a cuff panel. Add four 12 mm buttons.
④ Divide into upper sleeve, under sleeve, and cuff panel.
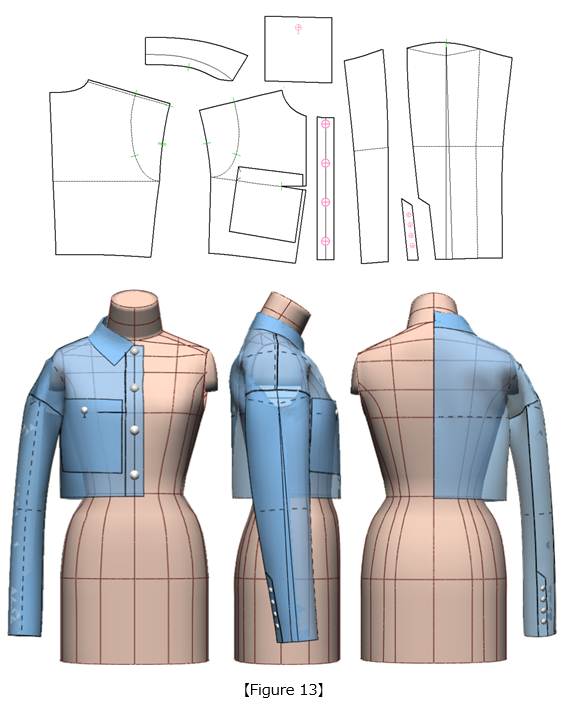
10. Perform a Toile Check on the Jacket
Figure 13: Set up the seam parameters and assemble the half-body toile. Check the drop-shoulder fall, collar width balance, and fit around the torso.
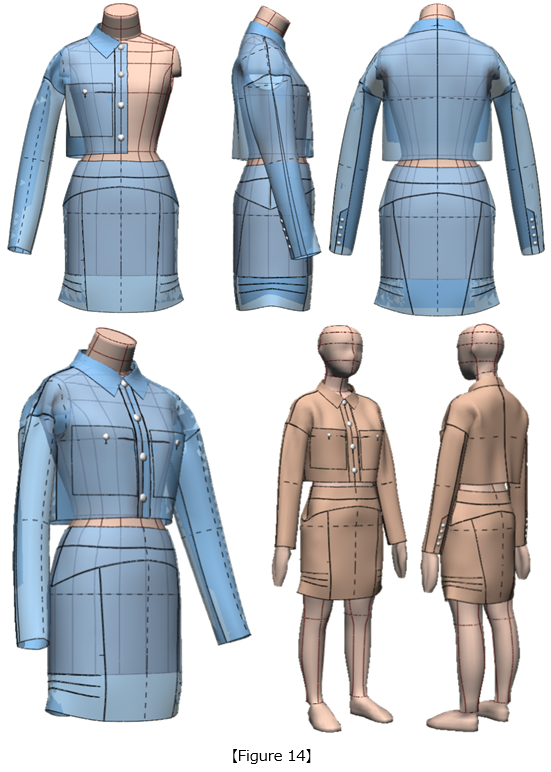
11. Combine With a Skirt and Perform a Toile Check
Figure 14: Use the ACS_LadiesHumanBody form to check for overall balance.
|
Masaharu Sekikawa 2002 - 2017: Principal at the International Total Fashion College Currently retired as principal and serving as a part-time lecturer at the International Total Fashion College, specializing in apparel CAD education. In June 2017, he published a book on digital toile research and simultaneously launched a website. Please see below. |

| Academic Presentations |
Delivered a presentation on "Pattern & 3D Simulation Verification of Women's Tailored Jackets Using 3D Toile" at the National Conference of the Fashion Business Society in 2016. Delivered a presentation on “Practical Applications of Digital Toile” at the National Conference of the Fashion Business Society in 2017. |
| Website | http://masa-cad.com/ |
| Publications | https://masacad.thebase.in/ |