
Chapter 13: Flared Skirt With Yoke Waist Pattern Development and Digital Toile Check
"Flat Pattern Making and Digital Toile Check" by Masaharu Sekikawa
- Study


Link copied.
The global COVID-19 pandemic significantly reshaped the way we work and study as companies and schools worldwide transitioned to new digital environments such as remote work and online classes. In the same way, the 2D flat pattern making and 3D digital toile check techniques covered in this chapter are sure to become an increasingly fundamental part of the fashion design process. In this chapter, we will cover how to use a skirt sloper created through draping to make a pattern for a flared skirt with a yoke waist and perform a digital toile check. Let's get started.
Chapter 13: Flared Skirt With Yoke Waist Pattern Development and Digital Toile Check
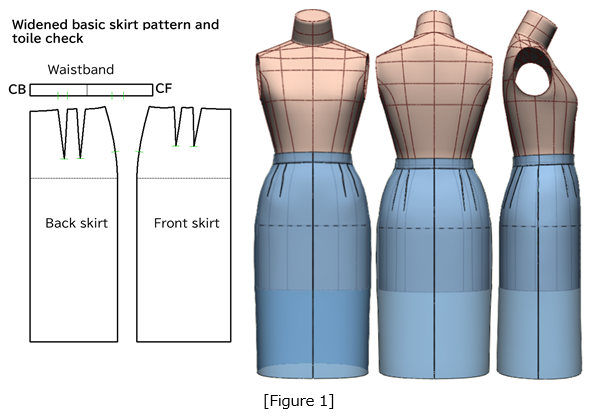
1. Perform a toile check on a skirt sloper that has been adjusted for added width
Figure 1: Check the toile of a skirt sloper created through draping and modified using flat pattern manipulation to add a total of 30mm to the waist and 40mm to the hip.
For detailed instructions on how to adjust the width of the skirt sloper, please refer to Chapter 7: Skirt Pattern Development and Digital Toile Check.
2. Developing the Yoke Waist Skirt from the Skirt Sloper
We will now explain some key points on how to create a pattern for a flared skirt with a yoke waist from the widened skirt sloper.
(1) Create the waist yoke using the waistband.
Figure 2: Extend the skirt length to 680mm. Create a 60mm-wide waistband that matches the finished waist measurement.
Draw the yoke seam line with a depth of 50mm at the center front and back, and 20mm at the side seams (marked in red).
Figure 3: ① Separate the yoke from the skirt along the yoke seam line (red line).
② Align the waistband with the separated yoke pieces, matching the corner points at the side seams (marked with circles).
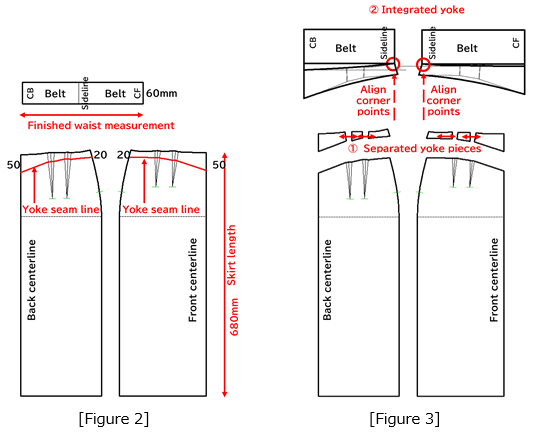
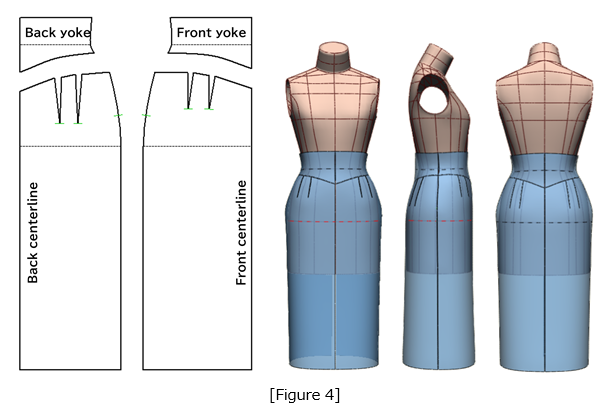
Figure 4: Perform a toile check on the finished pencil skirt with yoke waist.
(2) Develop the flare skirt
Figure 5: From the [Cutting Expansion] menu, enter the desired hem flare widths into the spread width table.
Use the red lines as expansion lines and the red circles as pivot points.
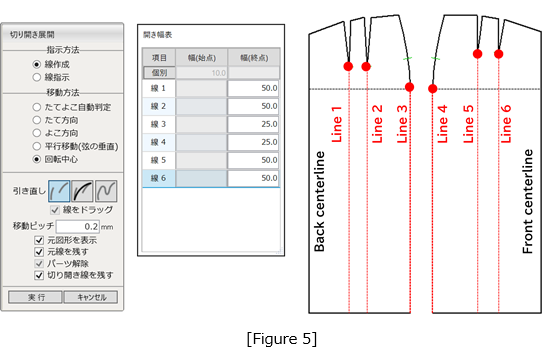
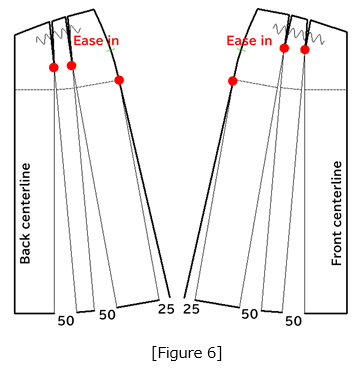
Figure 6: Use dart tips and the side seam and hip line intersections as pivot points.
Open the pattern by 50 mm at the hem and 25 mm at the side hem for each section.
Ease in any remaining dart intake after expansion.
(3) Create the digital toile.
Figure 7: Use the [Line Information] menu to assign stitching lines.
Figure 8: Use the [Placement] menu to position pieces onto the ACS_Ladies (Set-in) Body.

Figure 9: Use the [3D Preform] menu to stitch the pattern pieces together and create the digital toile.
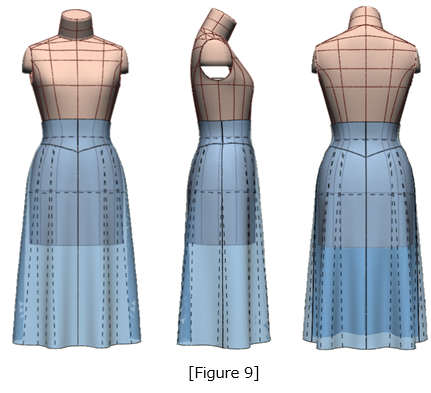
Figure 10: Use the [Create Line] menu to draw the waist flap line (blue line) on the 3D toile as desired.
Click the [Reflect to Pattern] tab to apply the flap line to the 2D front skirt pattern.
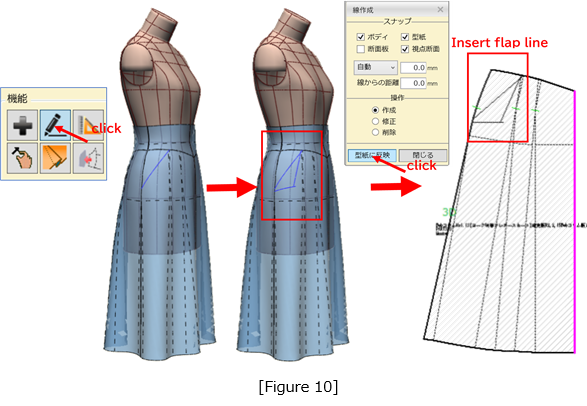
Figure 11: ① Use the [Line Information] menu to define the stitching line.
② Use the [Placement] menu to position the piece on the body.
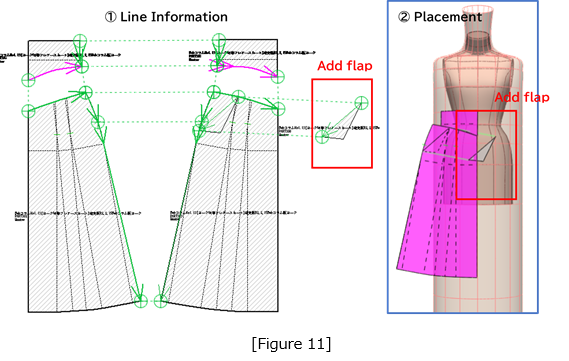
Figure 12: Use the [PM Preform] menu to stitch the flap pieces together and check the completed toile.
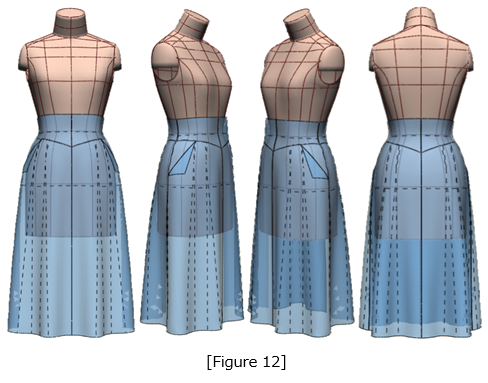
Figure 13: Use the [Line Information] menu to define new stitching lines for the jacket.

Figure 14: Use the [Placement] menu to reposition the jacket.
In [Layer Order], assign the skirt to layer 1 (closest to the body) and the jacket to layer 5 (outermost layer).
This allows the jacket to be layered over the skirt.
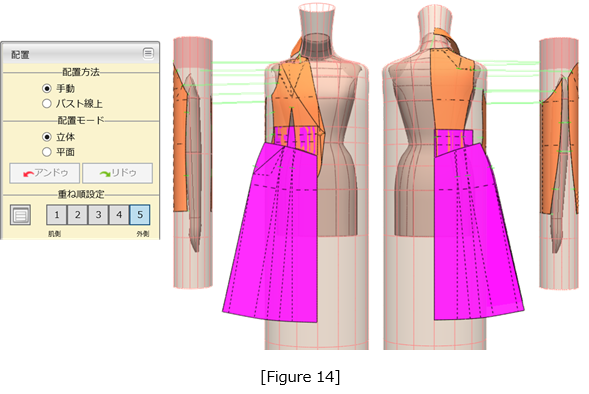
Figure 15: Use the [PM Preform] menu to place 5 mm thick-shoulder pads on the body and configure the line fixation and point fixation settings.
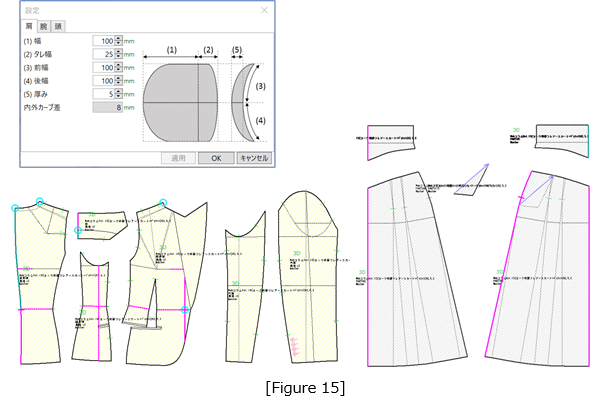
Figure 16: Use the [PM Preform] menu to run a simulation in the Arms Down A position and stitch the garment.
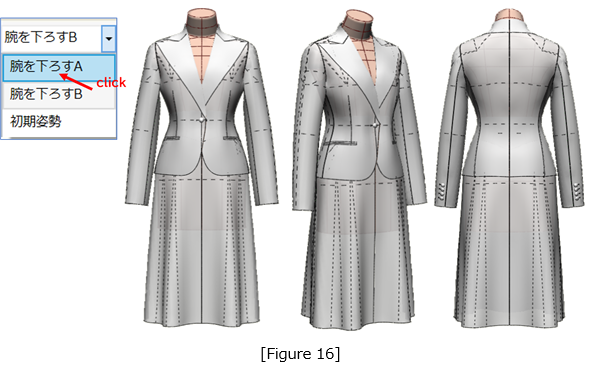
Figure 17: Adjust the ACS_LadiesHumanBody to match the sloper length measurements and modify it into a slim, length-adjusted custom body.
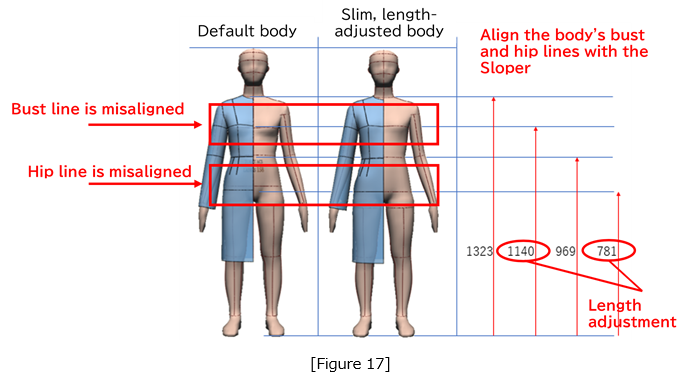
Figure 18: Use the slim, length-adjusted body created in Figure 17 and use [PM Preform] to run a simulation in the Arms Down B position and stitch the garment.
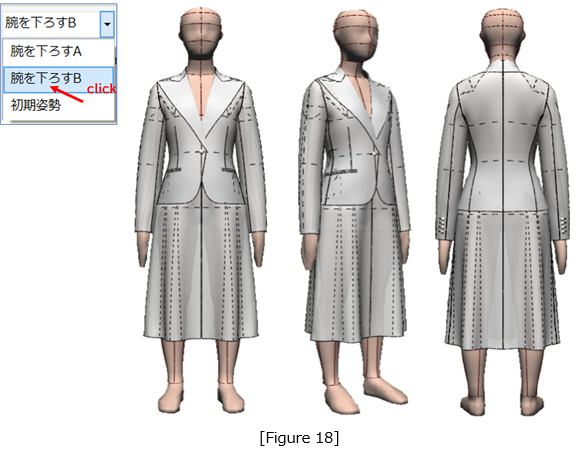
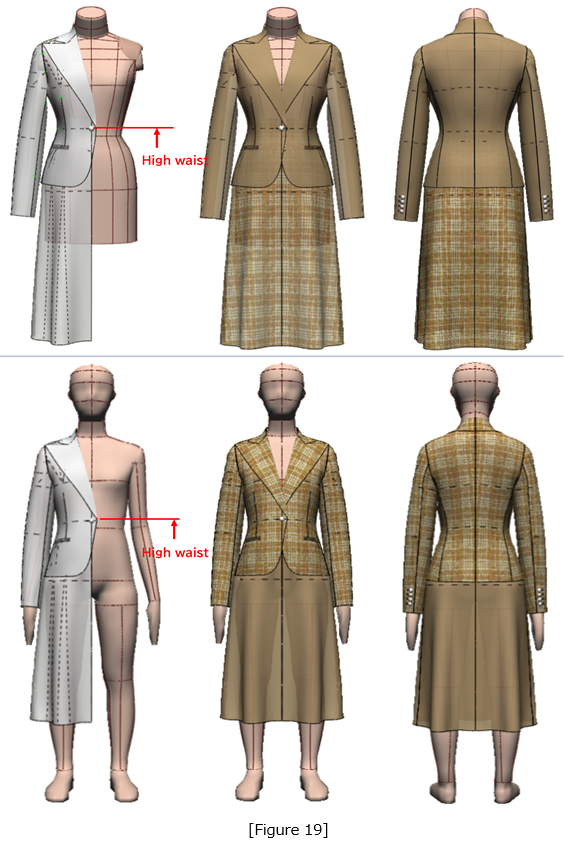
Figure 19: Apply fabric and print patterns to the toiles in Figures 16 and 18 and check overall fit and appearance.
|
Masaharu Sekikawa 2002 - 2017: Principal at the International Total Fashion College Currently retired as principal and serving as a part-time lecturer at the International Total Fashion College, specializing in apparel CAD education. In June 2017, he published a book on digital toile research and simultaneously launched a website. Please see below. |

| Academic Presentations |
Delivered a presentation on "Pattern & 3D Simulation Verification of Women's Tailored Jackets Using 3D Toile" at the National Conference of the Fashion Business Society in 2016. Delivered a presentation on “Practical Applications of Digital Toile” at the National Conference of the Fashion Business Society in 2017. |
| Website | http://masa-cad.com/ |
| Publications | https://masacad.thebase.in/ |